The Serious Eats Guide to Food Photography Lighting (2025)
The right lighting can make or break a food photograph? In the world of food photography, lighting is not just an accessory; it’s the foundation that elevates your culinary creations from mundane to mouthwatering.
This article will delve into the essentials of food photography lighting, offering tips and techniques to enhance your food images. By the end, you’ll be equipped with the knowledge to transform your food photos into stunning visual stories that entice any viewer.
What Makes a Photo Good?

A truly captivating food photography lighting transcends mere representation; it evokes a sensory experience that makes the viewer almost taste the deliciousness captured within the frame. Key elements such as vibrant colors and rich textures play a pivotal role in this visual feast.
A dish might boast a stunning array of ingredients, but if shot from an unappealing angle or with a yellow cast that washes out its appeal, even the most delectable meal can fall flat. Instead of blurry snapshots that fail to convey the essence of the food, thoughtful composition draws the eye, inviting the viewer to savor every detail.
Editing is another critical aspect that can elevate a food photo from mundane to mouthwatering. Brightening up colors, enhancing contrast, and sharpening textures can transform a simple plate into an irresistible masterpiece. However, the balance is crucial; over-editing can strip away authenticity, making the food appear artificial.
In the competitive world of food photography lighting, understanding how to manipulate light and shadow while maintaining the dish’s true essence is what separates a novice from a seasoned pro. Elevate your food photography game by experimenting with angles, lighting, and post-processing techniques that truly showcase the deliciousness of your culinary creations.
Great Natural Food Photography Lighting
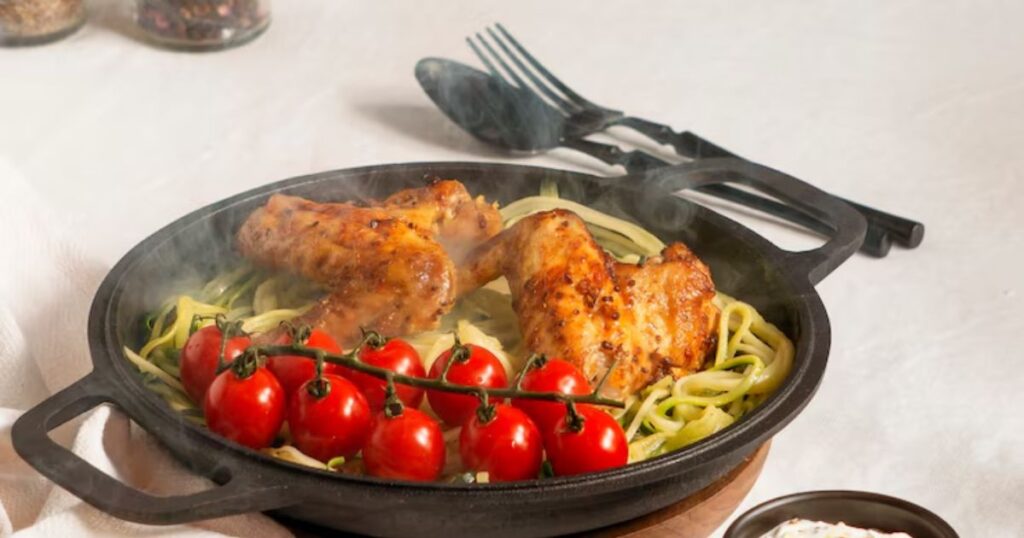
Good lighting can transform an ordinary scene into an extraordinary visual narrative, especially when harnessing the power of natural lighting. When capturing food photography, for instance, the magic often lies in the subtleties of indirect daylight.
This type of light not only enhances the rich colors and textures of your subject but also minimizes harsh shadows and glare that can detract from the overall composition. Utilizing window light allows for a soft diffusion that beautifully wraps around your subject, creating depth without sacrificing detail.
Positioning your setup to take advantage of backlighting can elevate your shots even further. By adjusting your shooting angle, you can create stunning silhouettes or highlight intricate details that might otherwise be lost in a blown-out photograph. A simple white sheet can serve as an effective reflector, bouncing light back onto your subject to fill in shadows and maintain texture.
This careful manipulation of light diffusion not only enhances your images but also reduces the need for extensive post-processing, allowing the natural beauty of your food to shine through effortlessly. Embrace the nuances of good lighting, and watch as your photography transforms into a feast for the eyes.
A Striking Composition : Food Photography Lighting
In the realm of food photography lighting, a striking composition is essential for transforming a simple dish into an alluring visual feast. Utilizing the rule of thirds can dramatically enhance your images; by placing your primary subject at one of the intersections on the grid, you create a natural visual flow that draws the eye.
Experimenting with different angles—whether shooting from eye level for an intimate feel or a bird’s-eye view for an expansive overview—allows you to discover the dish’s good side while framing it against a thoughtfully chosen background.
Flat lay arrangements offer a unique perspective, where straight lines and symmetry can create a sense of harmony. Conversely, shooting from a 45° angle can bring depth and dimension, emphasizing texture and detail.
Don’t hesitate to zoom in for close-ups that capture intricate elements, or zoom out to reveal the entire spread, engaging viewers by allowing them to appreciate the full context. By exploring multiple angles and employing techniques like camera slant, you can elevate your food photography, turning each shot into an artful narrative that invites viewers to savor every moment.
Thoughtful Styling
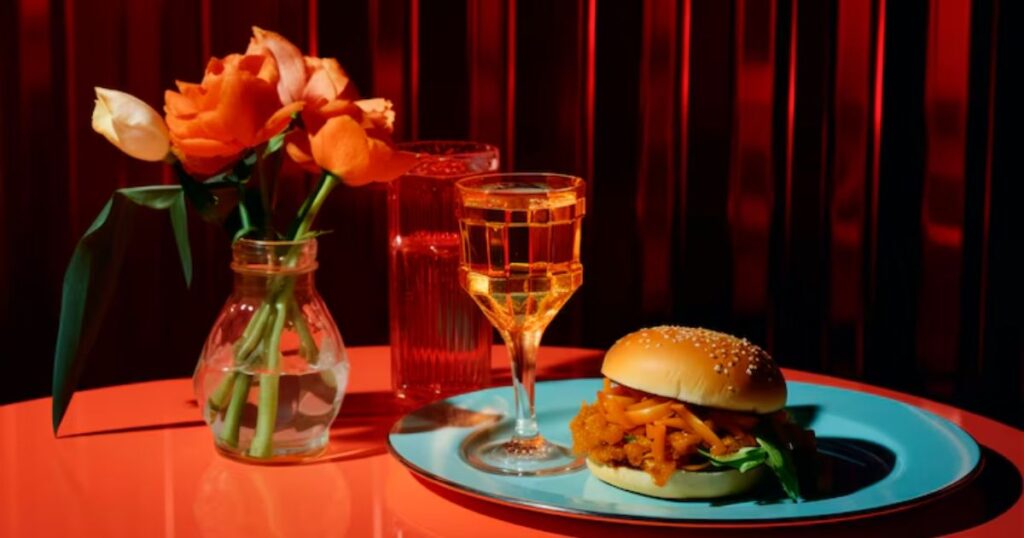
Thoughtful styling transcends mere aesthetics; it creates an engaging narrative that invites viewers to interact with the food. When dealing with unappetizing dishes, the choice of plate can make a significant difference.
Opting for round plates or salad-size plates can frame the dish beautifully, while patterns and colors from the color wheel can enhance visual appeal. Using complementary colors not only elevates the overall look but also adds depth, drawing attention to the food photography lighting focus.
Incorporating vintage props found at thrift stores can introduce character and warmth to your composition. Accessories like napkins and utensils should harmonize with your chosen background to maintain cleanliness and keep the viewer’s attention on the food itself.
Adding garnishes like fresh herbs or colorful toppings can introduce texture and contrast, enriching the visual experience. This dynamic composition transforms every shot into a story, making it not just about what is served, but how it is presented.
Remember, each element contributes to the overall interaction, inviting viewers to savor not just the food, but the artistry behind it.
Artificial Lighting

Artificial lighting has revolutionized photography, allowing photographers to capture in-focus photographs that reveal intricate details often lost in shadows or poor illumination. With tools like hotshoe flashes and portable lighting options such as the Lowell Ego or tabletop lights, photographers can create stunning images regardless of the time of day.
These lighting sources provide adequate light that mimics natural light, enabling a seamless transition from daylight to nighttime shooting without compromising quality.
One of the most exciting techniques in artificial lighting is the use of softboxes for a diffused glow that eliminates harsh shadows and yellow tints, providing a more flattering representation of subjects.
Additionally, window simulations can be crafted to replicate the gentle, natural light that many photographers crave, enhancing the overall mood of their shots. The ability to bounce light strategically allows for creative control over highlights and shadows, making every photograph a unique work of art. As technology continues to advance, the possibilities for using artificial lighting in innovative ways are virtually limitless, opening new avenues for creative expression.
Tripod
A tripod is an essential tool for photographers seeking to eliminate camera shake and capture clear shots, especially in low-light conditions. With a stationary camera, you can achieve in-focus shots that are often impossible to obtain with just steady hands.
Whether you’re shooting overhead images or experimenting with multiple exposure techniques, the stability provided by a tripod allows for creative exploration without the fear of blur ruining your masterpiece.
Modern tripods come with features like adjustable columns and versatile designs, such as tabletop tripods and smartphone tripods, making them accessible for both amateurs and professionals alike. For those on the go, a makeshift monopod can offer a quick alternative when a full rig isn’t practical.
Additionally, using a tripod in conjunction with drive mode can significantly enhance your photography experience, allowing you to capture a series of images in rapid succession without compromising quality. Embracing these tools opens up new possibilities, ensuring that every shot is as striking as you envision.
Getting Manual With It

Stepping into manual mode is like unlocking a treasure chest of creative possibilities in photography. While automatic mode simplifies the process, it often sacrifices the nuances of light adjustment that make an image truly stand out.
By taking control of your camera settings—shutter speed, aperture, ISO, and white balance—you can sculpt your food photograph lighting with precision, ensuring each shot reflects your artistic vision. For instance, manipulating a wide aperture allows for stunning background blur, elevating your subject against a soft canvas, while a narrow aperture sharpens the entire scene, perfect for landscapes.
Shooting manually not only enhances your technical skills but also deepens your understanding of exposure and contrast. You’ll discover how different lighting conditions, whether natural or artificial, impact your images.
Experimenting with these elements empowers you to create balanced images that resonate with emotion and depth. As you navigate through various photography settings, embrace the challenge—each misstep is a stepping stone toward mastery, revealing new insights into image control and the art of visual storytelling.
Shutter Speed
Shutter speed is more than just a technical setting; it’s the heartbeat of your food photography lighting, dictating how motion is captured in a split second. When shooting handheld, a shutter speed of 1/80 sec can stabilize your images against slight camera motion, but as you dip to 1/40 or 1/20 sec, the risk of image blur increases, especially if you’re not using a tripod.
This delicate balance between speed and stability opens up creative avenues in genres like food photography, where a well-timed shot can freeze a droplet of sauce mid-air or capture steam wafting from a hot dish.
Exploring shutter speed through Tv mode allows photographers to experiment with motion capture intentionally. For instance, a slower shutter speed can evoke a sense of movement, turning a bustling street scene into a dreamy blur while still retaining focus on a stationary subject.
In contrast, faster speeds can freeze action, making them ideal for dynamic moments. Adjusting your aperture in tandem with shutter speed not only affects exposure but also influences depth of field, enabling you to highlight intricate details that often go unnoticed. Embracing these nuances can transform mundane scenes into striking visual narratives, inviting viewers into the moment as if they were right there with you.
Aperture (F-stop)
Aperture, often denoted in f-stops, serves as the gateway through which light enters the camera, significantly influencing both exposure and artistic expression. With a wide aperture, such as f/2, photographers can achieve a stunning shallow focus, allowing the subject to pop against a beautifully blurred background.
This effect is particularly cherished in portrait and food photography lighting, where the allure of a creamy bokeh can elevate the viewer’s experience. Conversely, a narrow aperture like f/11 increases the depth of field, ensuring that both foreground and background elements remain in sharp focus—a technique often employed in landscape photography to capture the full majesty of a scene.
The mechanics behind aperture are intriguing; it relies on the lens blades that contract or expand to regulate the amount of light hitting the sensor. Think of it as your eye’s pupil—dilating in low light and constricting in bright conditions.
Understanding this relationship opens up new creative avenues, especially when using aperture priority (Av mode) on your camera. By mastering the aperture range, photographers can manipulate light and focus to tell compelling stories through their images. Whether you’re capturing the intricate details of a gourmet dish or the sweeping vistas of nature, playing with aperture allows for endless exploration and expression in food photography lighting.
Wait, So What Settings Should I Use?

When venturing into photography, particularly in low light settings, understanding the interplay between your camera’s settings can transform a mundane shot into a stunning masterpiece.
Using a wide aperture, like f/3.5, allows more light to enter the lens, which is crucial for capturing intricate food details or vibrant subjects against a blurred background. This shallow focus not only emphasizes your subject but also creates a beautiful depth of field that draws the viewer’s eye right where you want it.
However, it’s essential to balance this with your shutter speed and ISO settings. In dim environments, a high ISO can introduce unwanted image grain, potentially diminishing the overall quality of your photos.
To counteract this, consider adjusting your shutter speed; a slower speed can help gather more light but be wary of camera shake. Aim for a focus range that captures the essential elements of your composition while ensuring well-lit areas remain crisp and clear, making your shots both visually appealing and technically sound.
White Balance

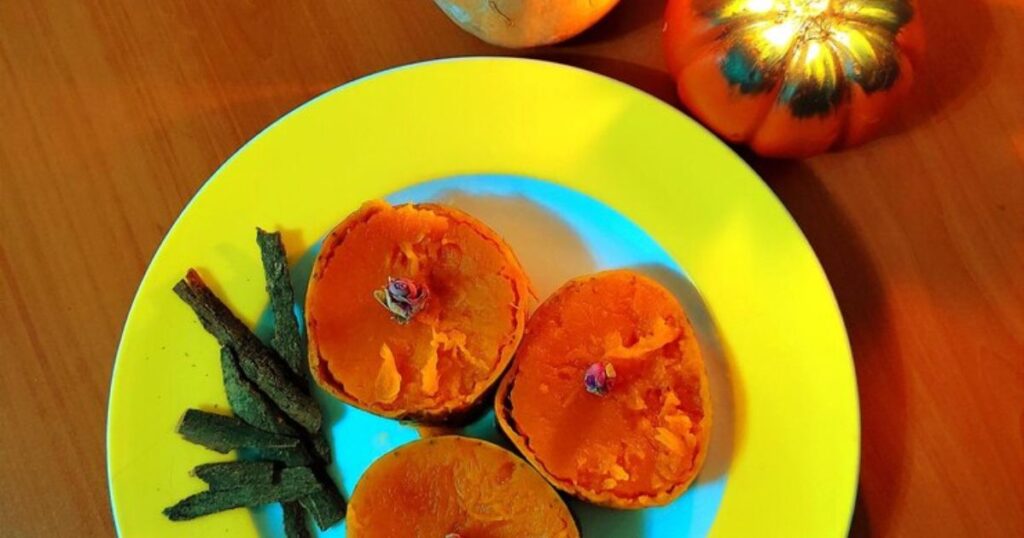
White balance is often an overlooked aspect of food photography lighting, yet it plays a crucial role in capturing vivid colors that reflect the scene’s true essence. When shooting under various light sources—be it incandescent light, candlelight, or even natural light—the potential for color cast can dramatically alter the mood of your images.
For instance, the warm glow of a candle can introduce a rich amber tint that may enhance a cozy atmosphere but can also distort the original colors if not correctly adjusted. Understanding how to manipulate white balance settings—whether through automatic white balance or a custom white balance using a gray object—allows food photography lighting to achieve accurate color reproduction and maintain the integrity of their vision.
In scenarios involving multiple light sources, achieving the perfect color balance becomes even more critical. The interplay between different lighting types can create challenges, making your images appear inconsistent or flat. Here, the interplay of shutter speed and aperture comes into play as well; these settings can help you control exposure while ensuring that your white balance is spot on.
Utilizing tools in post-production to fine-tune white balance can be beneficial, but starting with a strong foundation in-camera allows for greater flexibility and creativity later. Ultimately, mastering white balance not only enhances the visual impact of your photographs but also empowers you to express your unique artistic voice.
Also Read:What Food Styling Is 2025(And Why You Need To Learn It As A Food Photographer)
Conclusion
Mastering lighting in food photography lighting is crucial for capturing the true essence and appeal of your dishes. By experimenting with natural light, artificial sources, and reflectors, you can create stunning images that draw viewers in.
Understanding the interplay between light and shadows allows you to highlight textures and colors effectively, enhancing the overall presentation of your food. Remember, good lighting can transform an ordinary meal into a visual feast. So grab your camera, play with your lighting setup, and start showcasing your culinary creations in the best possible light!